Table of Contents
Whether you’re planning a reunion, a networking mixer, or a career fair, Gradnet provides you with the tools you need to create successful alumni events with ease.
In this guide, we’ll walk you through the process of creating an alumni event step by step, leveraging Gradnet’s intuitive interface and powerful features.
1. Accessing the Event Creation Interface #
- Log in to your Gradnet account using your credentials.
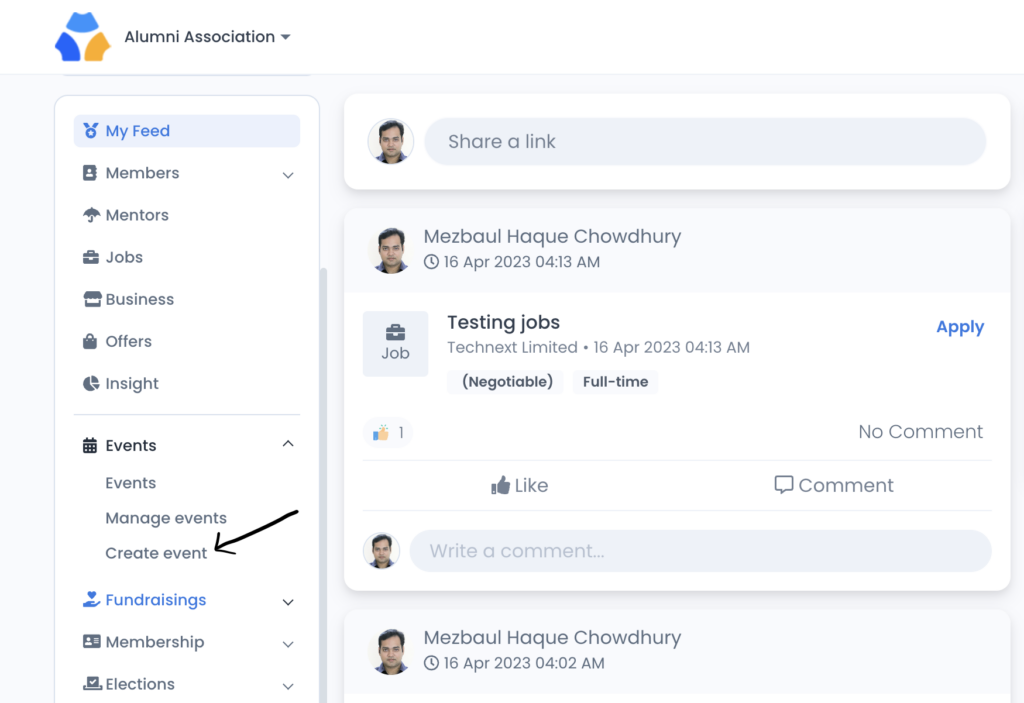
- Once logged in, navigate to the main dashboard and check the sidebar for the event tab.
- Go to the “Events” tab and click on it to see more choices. Look for “Create Event” and click on it to start making a new event.
Setting Up the Event Basics #
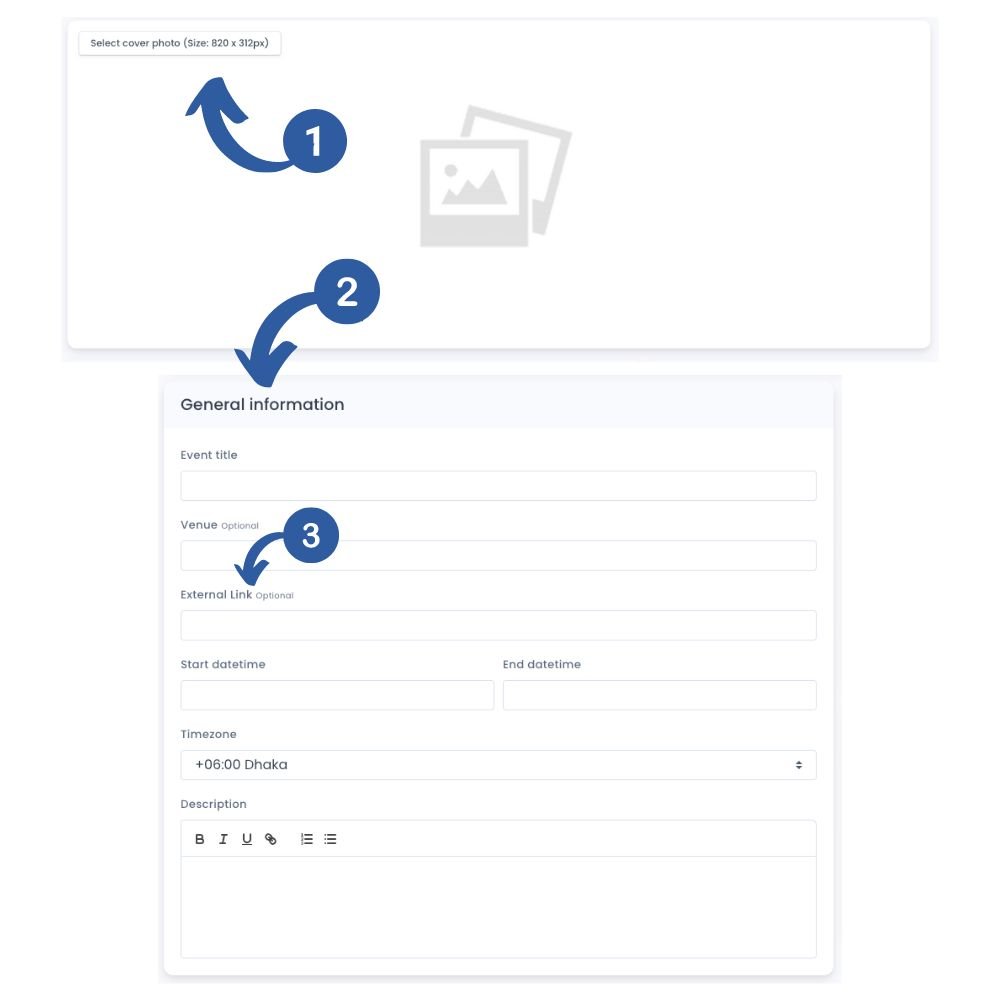
- Choose a Cover Photo:
- Click on the option to upload a cover photo for your event. Choose an image that represents your event well and attracts attendees’ attention. Choose 820x312px pictures for the best view.
- Fill in General Information:
- Enter the basic details, such as the event title, description, date, and time. Ensure these details are accurate and descriptive to inform attendees about the event.
- Add Online Meeting Link (If Applicable):
- If your event is online, provide a Zoom or Google Meet link to allow attendees to join virtually. This step ensures seamless participation for remote attendees.
Choosing an Event Type and Ticketing #
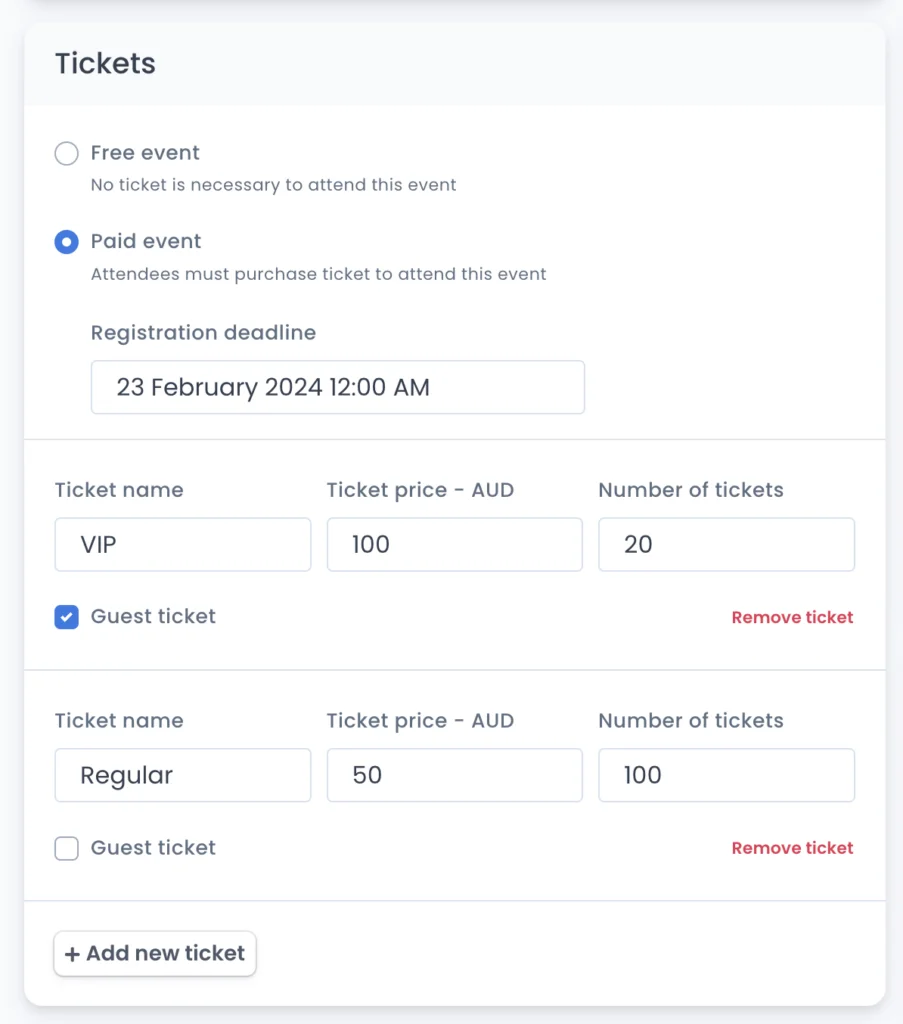
- Select Event Type:
- Determine whether your event will be free with registration or a paid event with tickets. Choose the option that best fits your event’s objectives and specifications.
- Set Up Ticket Types (For Paid Events):
- If your event requires tickets, set up the primary ticket types and any additional guest ticket options. Specify the pricing, quantities, and any other pertinent details.
- If event registration is necessary, you can set up registration requirements here. Be sure to include the registration deadline.
Scheduling the Event #
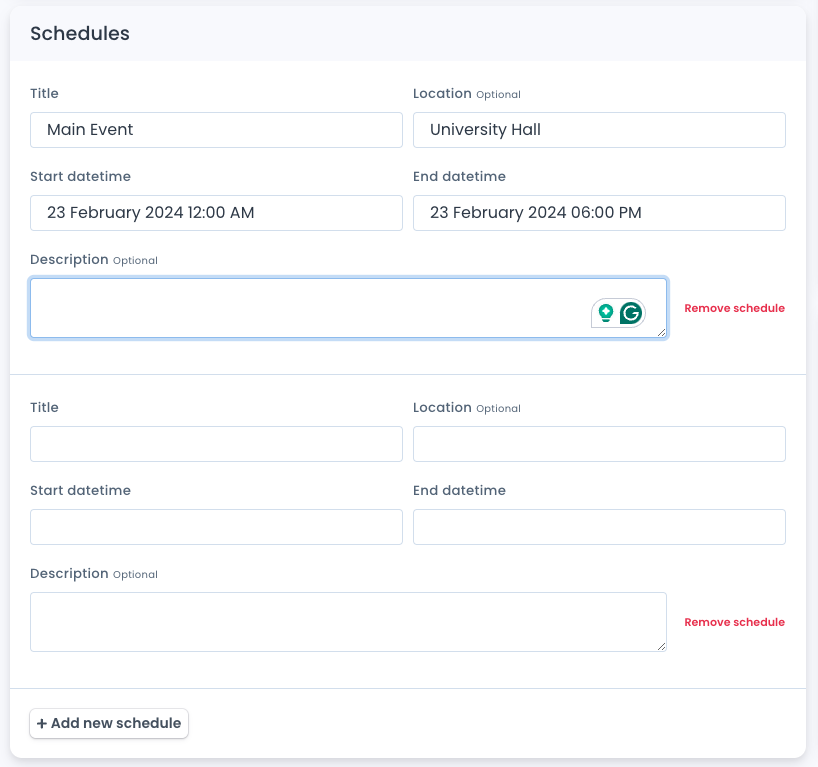
- Add Schedule of Your Event
- To make a schedule for your event, write down the title, where it will happen, the date, and the time. Also, add a short description to explain what will happen during each part of the event.
- Add Multiple Schedules (If Needed):
- If your event spans multiple sessions or activities, add multiple schedules to provide attendees with a clear agenda. Include details such as session names, start/end times, and locations.
- Fill in Schedule Information:
- For each schedule, provide detailed information to inform attendees about what to expect. Include descriptions, speakers, and any other pertinent details.
Taking Custom Attendee Information #
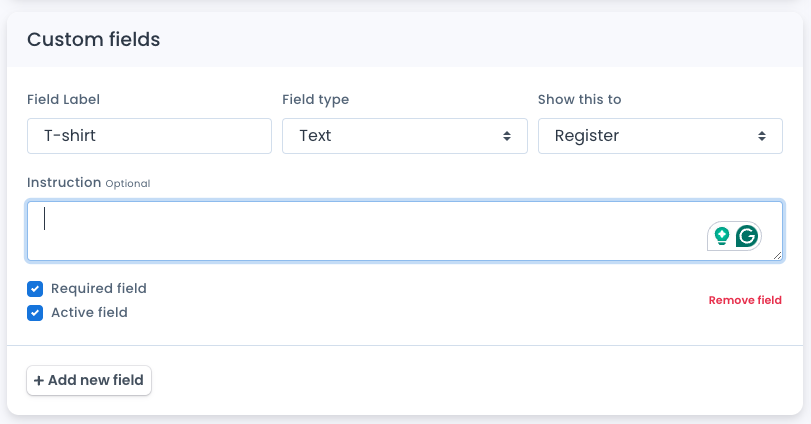
- Use Custom Fields:
- Utilize custom fields to collect additional information from attendees, such as T-shirt sizes, pickup/drop-off points, or dietary preferences. Choose appropriate field types like drop-down menus, text boxes, or email addresses.
Setting Event Privacy and Permissions #
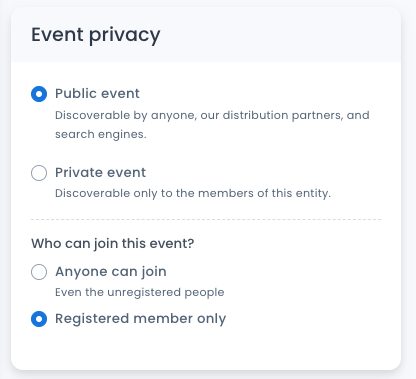
- Choose Event Privacy Settings:
- Determine whether the event will be private or public. Select the appropriate option based on the event’s nature and audience preferences.
- Manage Event Access:
- Specify who can join the event by setting permissions accordingly. This ensures that only intended participants can access the event.
Saving and Managing Your Event #
- Save or Publish Event:
- Save the event as a draft if you’re not ready to publish it immediately. Alternatively, publish the event live to make it visible to attendees.
- Manage Events:
- In the “Manage Events” section, you can view, edit, or delete any event as needed. This allows for easy management and updates to event details.
Viewing Attendee Details #
- Access Attendee List:
- View a comprehensive list of all attendees registered for your event. This provides insight into attendee demographics and participation.
- Download Attendee Information:
- Download attendee information in CSV format for further analysis or communication purposes. This feature enables seamless data management and follow-up with attendees.


